Cold Weather Solutions

DAVCO continues to have the industry's leading solution for keeping diesel fuel from gelling in cold weather conditions and your diesel fuel free from water and contaminants. DAVCO offers 12 and 24VDC pre-heaters, 120VAC overnight heaters on Diesel Pro® and Fuel Pro® models. Coolant heat is an additional option available on Fuel Pro® 382 and Fuel Pro® 483.

If you have been struggling with fuel waxing during vehicle operation, DAVCO recommends that you order one, or multiple combinations of the noted pre-heaters for cold start improvement along with the engine coolant heat feature. Most truck OEMs currently offer engine return fuel as the fluid heat source for the DAVCO Fuel Pro® 382 and Fuel Pro® 483. Consult with your local dealer or OEM and ask for the coolant heat option.

snow plow

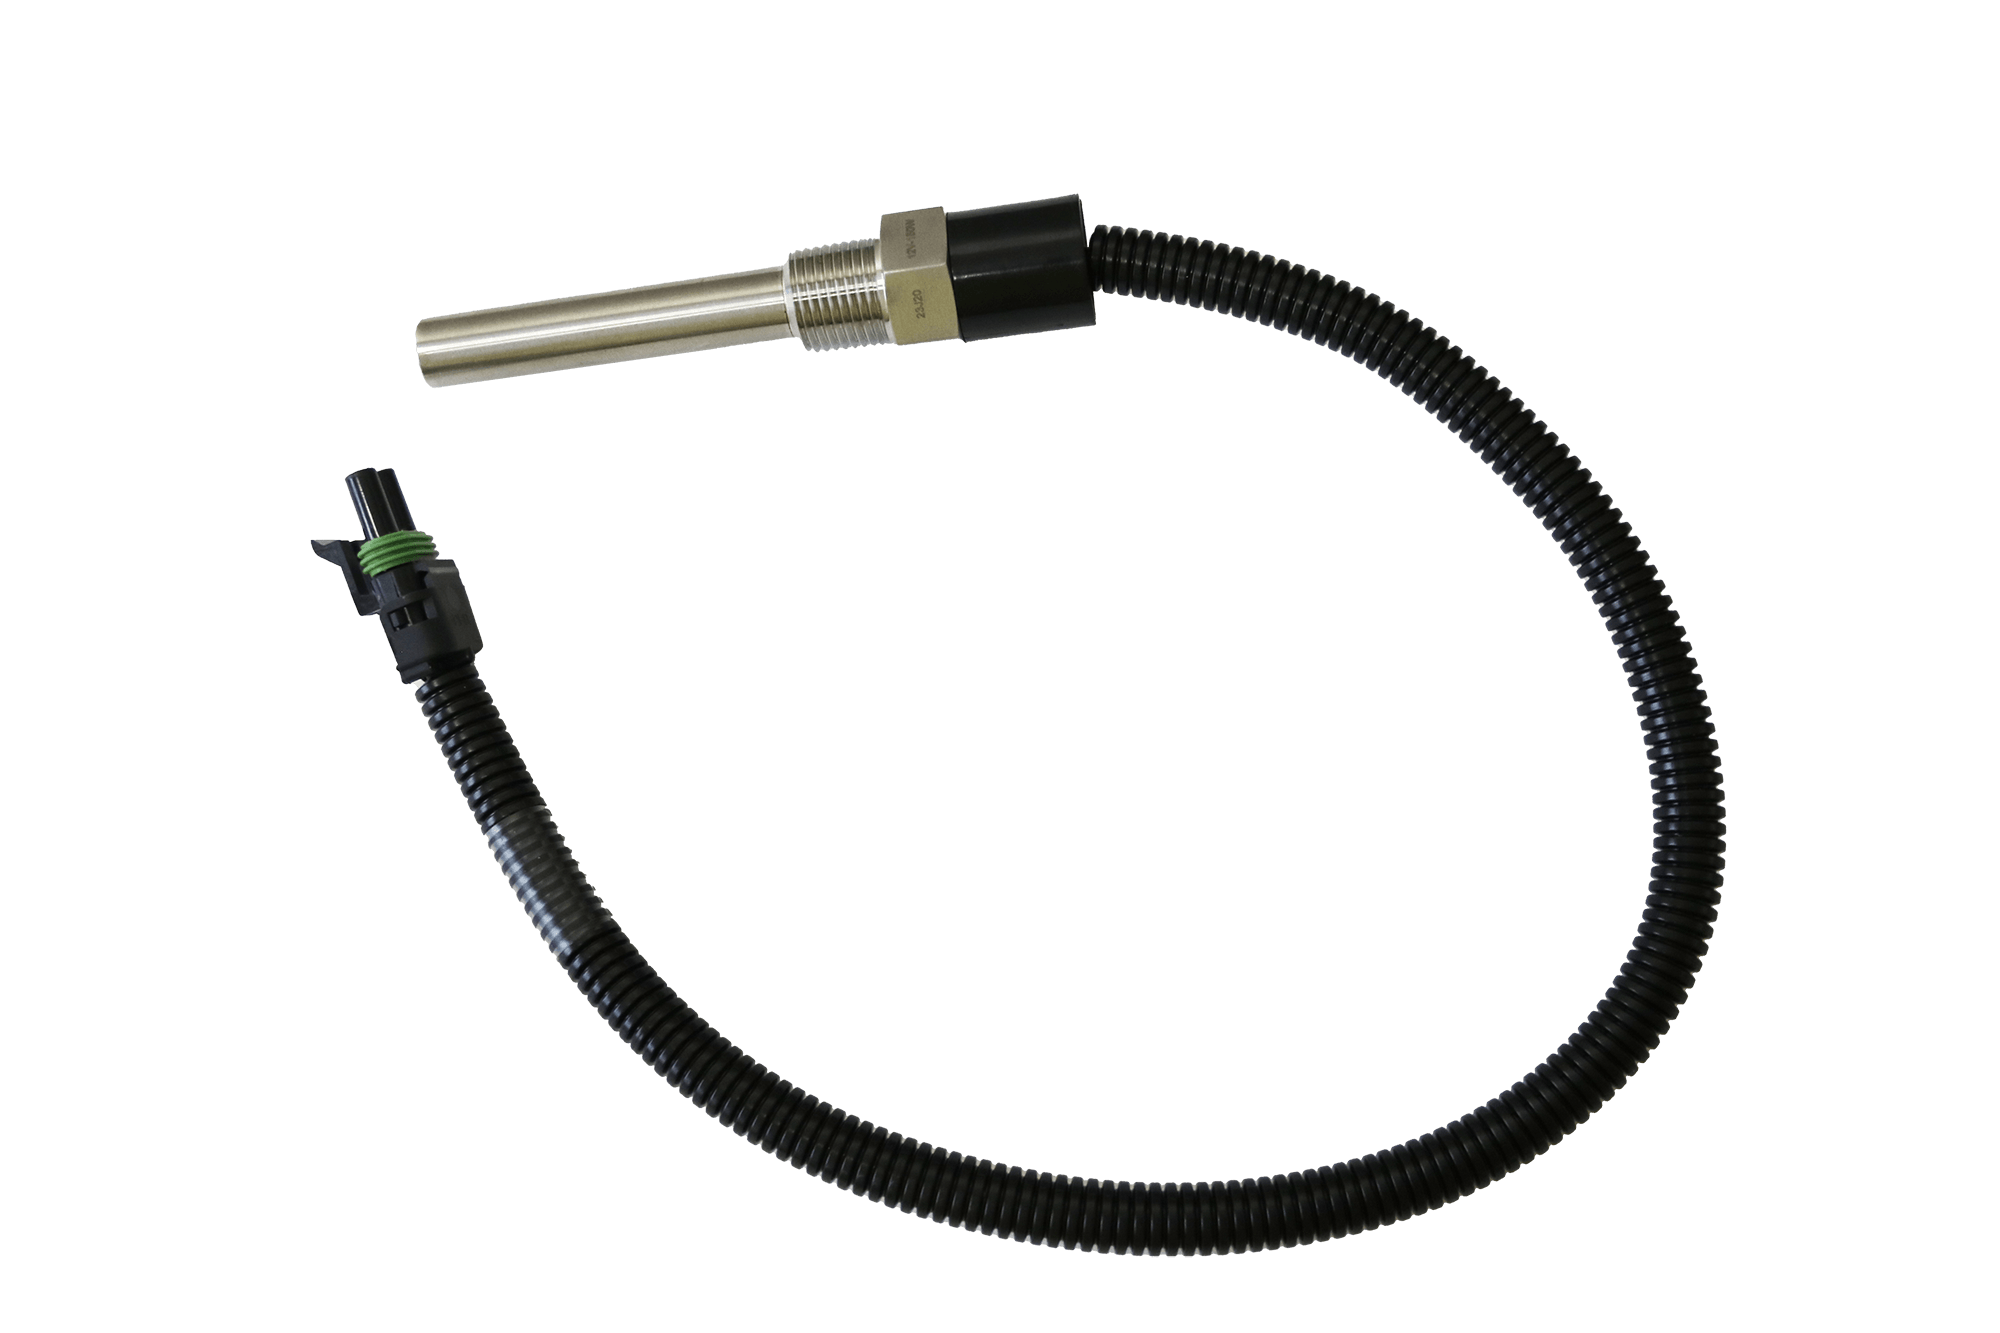
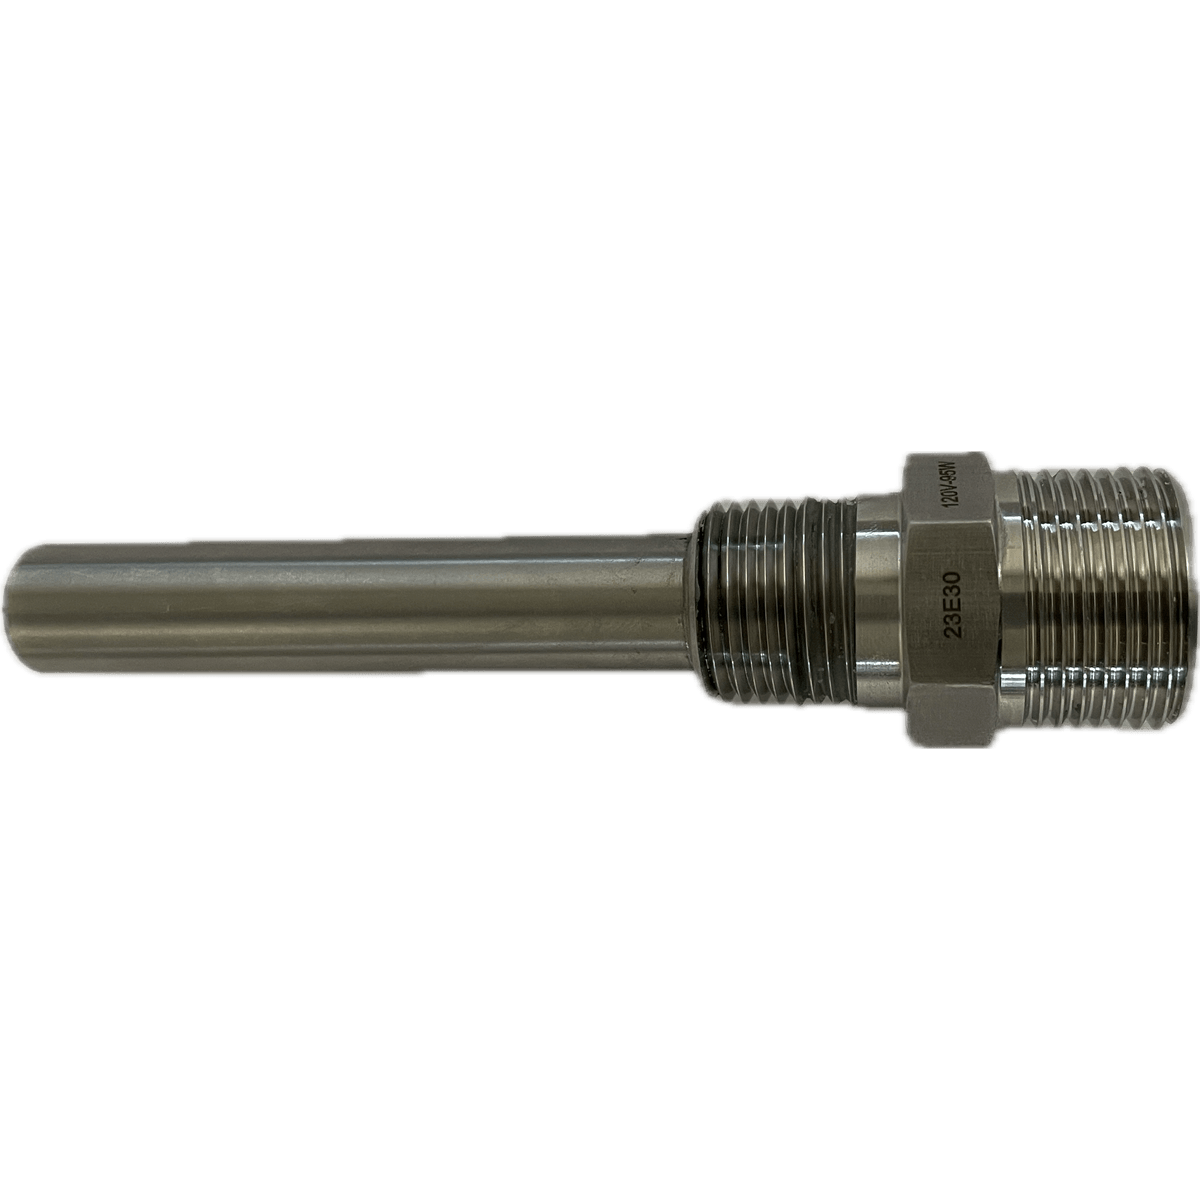
Electric Pre-heaters

To determine the correct number for your application refer to the OEM Order Codes or call Customer Service at 800-328-2611 or 734-429-5665.
12VDC Electric Pre-heater
Identify the correct heater for your fuel processor on this page

There are various configurations of electric pre-heaters and thermoswitches available for the Fuel Pro/Diesel Pro. These include 12VDC pre-heaters, 24VDC pre-heaters, 120VAC pre-heaters/thermoswitches, and combination pre-heater thermoswitches. The voltage and wattage ratings are stamped either on the sheath or the hex of each component for identification.

Prior to 2014, 12VDC pre-heaters uses a resistance heater (below). This style of heater has a smooth element and a gold color fitting.

After 2014, the DAVCO 12VDC Heater was changed to a PTC Heater (below). The PTC heater has fins on the element, a black cap on the end and a "silver" colored element. Note that the fitting does not have an extension on it.

120 VAC Overnight Heater

Purchase the 120 VAC Overnight heater online.

Install a 120VAC plug-in pre-heater for overnight cold weather elimination of fuel wax. The 120VAC Watt pre-heater warms fuel when your truck is sitting and freezing on those cold winter nights. Warm fuel won’t ‘wax’ and plug filters. DAVCO 120VAC pre-heater plugs into the same power outlet you use for engine block heaters. If your truck already has block heaters or engine heaters which connect to 120VAC plugs, you may be able to wire the DAVCO pre-heater into that same wiring harness using “Y” cord P/N 102015. Purchase the Y cord on the DAVCO online store.

Coolant Heat

Coolant Heat is available for the Fuel Pro 382 and the Fuel Pro 483.

To determine the correct number for your application refer to the OEM Order Codes or call Customer Service at 800-328-2611 or 734-429-5665.

 
Fuel Pro 382 Coolant Heat

The Fuel Pro 382 Coolant heat model has an extended bottom plate for the radiator, thermovalve and fluid connections. To determine the correct number for your application refer to the OEM Order Codes or call Customer Service at 800-328-2611 or 734-429-5665.

How it Works

Unfiltered, cold fuel flows from the fuel tank into the body of the Fuel Pro. Coolant heat is routed through the coolant manifold. The body of the Fuel Pro is warmed by the coolant and the heat is transferred into the fuel. The warmed fuel passes through the filter. The warmed, filtered fuel is sent to the engine. The coolant and the fuel paths are separate and there is no contact.

Coolant Heat Routing in Series
 
Fuel Pro 483 Coolant Heat

The Fuel Pro 483 model after September 2015 is equipped for coolant heat connections. An upgrade kit with instructions is for Fuel Pro 483 models installed before 2015.

How it works

Unfiltered, cold fuel flows from the fuel tank into the body of the Fuel Pro. Coolant heat is routed through the coolant manifold. The body of the Fuel Pro is warmed by the coolant and the heat is transferred into the fuel. The warmed fuel passes through the filter. The warmed, filtered fuel is sent to the engine. The coolant and the fuel paths are separate and there is no contact.

Route coolant lines in parallel

Return Fuel Heat

Return Fuel Heat is available for the Fuel Pro 382 and the Fuel Pro 483.

To determine the correct number for your application refer to the OEM Order Codes or call Customer Service at 800-328-2611 or 734-429-5665.

 
Fuel Pro 382 Return Fuel Heat
return fuel diagram

The Fuel Pro 382 Return heat model has an extended bottom plate for the radiator, thermovalve and fluid connections. To determine the correct number for your application refer to the OEM Order Codes or call Customer Service at 800-328-2611 or 734-429-5665.

engine diagram
How it Works

Unfiltered, cold fuel flows from the fuel tank into the body of the Fuel Pro. Heated fuel is routed into the fuel manifold. Returned warm fuel from engine flows into the housing when thermostat senses fuel temperature below 95⁰F. All returned warm fuel from engine flows back to tank when thermostat senses fuel temperature above 115⁰F. Warmed fuel blends with cold fuel and is sent through the filter.

  • additives
    Additives and Fuel Quality
    Additives or "Flow Improvers" change the shape of the wax crystals, allowing wax to pass through the filter more easily. However, it is possible to "over-dose" fuel with additives. This can lead to unexpected effects, such as corrosion. The better alternative is to warm the fuel before it enters the lift pump with DAVCO's 12VDC pre-heater or 120VAC overnight heater. In addition, incorrect mixing of additives can cause the water in the fuel to look like fuel, making it difficult to know when the water needs to be drained.
  • clouds in fuel
    Gelling
    Gelling is the process where the state of the fuel becomes thick and cloudy, either from the presence of paraffin (wax) or frozen water suspended in the fuel. When fuel is gelled, it can't flow to the engine. To liquify the fuel, the best solution is to add heat at the fuel filter, not chemicals to the tank. DAVCO has a variety of fuel heating options for all Diesel Pro and Fuel Pro models.
  • snow
    Restriction
    If water freezes in fuel lines, filters become plugged with wax or gelled fuel. This will result in of low power from the increased fuel restriction. Regular use of effective fuel heating systems during cold months can prevent down time and costly tow bills. Eliminate time consuming engine and fuel system troubleshooting activities by delivering temperature controlled fuel to the engine.
  • water in fuel
    Suspended Water
    Water suspended in the fuel will exhibit a hazy appearance. If the fuel appears hazy after heating, drain the water. Suspended water thickens fuel by making it "slushy" and it is also detrimental to the performance and life of the injectors and fuel module system. The clear cover provides the ability to view the condition of the fuel before it flows to the engine.
  • condensation
    Condensation
    As the ambient air temperature drops, the ability for water to condense in the fuel tank increases. Condensation can be carried into the DAVCO unit. As a result, it is recommended that water be drained from the DAVCO unit weekly. During periods of extreme cold it may be necessary to drain the unit even more frequently. If condensation is a problem in fuel storage tanks, the best solution is to use a Shop Pro to remove the water before it is pumped to the vehicle or equipment fuel tank.
  • micron
    Filter Micron Rating
    The fuel filters are the only protection the engine has against contaminants in the fuel. Ensure the correct fuel filter is installed in the DAVCO unit. A larger micron fuel filter should never be used for the purpose of extending filter life or increasing flow. Such action may void the engine warranty and can be damaging to the fuel injection system. The EleMax filter design with StrataPore™ Media manufactured by Cummins Filtration provides the best protection – period. Refer to the filter page on this website for the recommended filter for your application or download form F3105, Recommended Filter Guide.
  • hose
    Tanks and Lines
    Some vehicles or equipment come with drains in the fuel tank to allow for the draining of any collected water or contaminants. If the fuel tank is equipped with a drain, use the drain to remove any collected water in the bottom of the tank. If there are no drain ports in the fuel tank, it will be necessary to remove any collected water by another means. A DAVCO Shop Pro is the recommended shop tool for such a procedure. Ensure that no loops and water traps have developed in the fuel lines from the fuel tank to engine. A loop or low spot in hoses can collect water and could freeze and restrict fuel flow. When possible, keep the fuel in the tanks above the half full level to minimize the potential for formation of condensation.
  • wax
    Wax
    When fuel is cooled below the temperature at which wax forms crystals (cloud point), the wax deposit can block filters, reducing or completely stopping fuel flow to the engine. The wax can form as a result of using the wrong fuel for the season or region. Wax takes the appearance of a yellow suspension in the fuel. If wax blocks the fuel filter, warm the fuel. Once the fuel is warmed, it will rise above the pour point, at which the fuel can flow without causing restriction.
  • battery
    Battery Power
    A battery load test is recommended to ensure there is sufficient power for cold ambient starts. It is recommended to plug in a 120VAC DAVCO fuel heater while the engine is still warm as opposed to attempting to heat a cold engine. If your DAVCO Fuel Processor has the optional 12VDC pre-heater, turn the ignition key to the “on” position. The DAVCO clear cover provides an clear visual of the fuel condition. The fuel should be in a liquid form when it is heated above the cloud point with the optional DAVCO pre-heater feature.
Diagnostics with the Clear Cover
Fuel level is not to the top of the fuel filter. Normal - Do not change the filter.
Fuel level is at the top of the filter. Low power. Change the filter at the first available opportunity.
Fuel level is at the top of the filter and looks to be full of wax. Change the filter - Run engine for a minimum of 25 minutes at idle. Do not run at full RPM.
Bubbles are seen flowing in with the fuel. Check all fittings and lines from the fuel tank to the Fuel Processor. Check lower and upper collar o-rings.
There is a power complaint and the fuel level is below the collar. Check for a missing grommet at the lower end of the filter or missing/broken spring at top of filter.
Water is noticed in the cover. Drain the Fuel Processor. Do not drain with the engine running. Drain a full cup at a time. Restart the engine -- shut off engine and continue to drain and restart until ALL water is removed. If engine coolant is visiblefollow proper engine pressure testing procedures to determine root cause.
Fuel drains back to the fuel tank when changing the fuel filter or draining separator. Remove the check valve assembly. Clean or replace and retest.
No engine coolant (Fuel Pro only). Check for closed cutoff valves at the coolant lines to the Fuel Processor. Make sure the cab heater valve is open.
Electric Pre-heater Testing

There are various configurations of electric pre-heaters and thermoswitches available for the Fuel Pro/Diesel Pro. These include 12VDC pre-heaters, 24VDC pre-heaters, 120VAC pre-heaters/thermoswitches, and combination pre-heater thermoswitches. The voltage and wattage ratings are stamped either on the sheath or the hex of each component for identification.

Prior to 2014, 12VDC pre-heaters uses a resistance heater (below). This style of heater has a smooth element and a gold color fitting.

After 2014, the DAVCO 12VDC Heater was changed to a PTC Heater (below). The PTC heater has fins on the element, a black cap on the end and a "silver" colored element. Note that the fitting does not have an extension on it.

Equipment Needed:
  • A precision low resistance ohm meter capable of measuring 1/10th ohm or less.
  • Current flow meter (clamp-on type for DC current).
  • Ice, dry-ice, CO2 or some means of chilling the thermoswitch.
  • A flameless source of heat. (ie: infrared heat lamp, etc.) Note: A Vortex tube is a good tool to heat and cool for testing.
    • DO NOT USE a test light that has a wire probe for any of these tests. If the wiring insulation is punctured, moisture and road salt can penetrate into the wires creating a corrosion issue and potential failure.
Draining the Diesel Pro or Fuel Pro
  • Shut off the engine and set the parking brake.
  • Attach a length of hose to the drain valve and place a receptacle under the Fuel Pro/Diesel Pro.
  • Loosen the vent cap on top of the clear housing. Open the drain valve and drain the fuel into the receptacle.
  • When the fuel is drained, close the drain valve.
12 VDC PTC/24VDC Heater Performance Test
  • Disconnect the harness from the heater.
  • Connect the ohm meter leads to the pins of the heater. Use the following to determine whether the pre-heater resistance value is in the acceptable range.
PTC Pre-heater (Post-2014) Watts  Resistance Range (ohms)
12VDC (PTC) 195 W 0.4 to 0.6 @ 77°F (25°C)
24VDC (PTC) 195 W 2.0-3.0 @ 77°F (25°C)
Pre-heater Operation Test - Pre-2014 Pre-heaters
  1. Disconnect the pre-heater from the harness.
  2. Connect the ohm meter leads to the pins of the pre-heater. For heaters with one pin, connect to the pin and the bushing.
  3. Use the table to determine whether the pre-heater resistance value is in the acceptable range.
Electric Pre-heater Watts  Resistance Range (ohms)
12VDC (two pin) 250 W 0.6 to 0.8
12VDC (single pin) 250 W 0.6 to 0.8
12VDC (single pin) 150 W 0.8 to 1.1
12VDC (two pin) 150 W 0.8 to 1.1
24VDC (two pin) 250 W 2 to 2.5
24VDC (single pin) 250 W 1.8 to 2.3
24VDC (single pin) 150 W 3.6 to 4.1
24VDC (two pin) 150 W 3.6 to 4.1
120VAC 75 W 173 to 203
120VAC 37 W 369 to 411
Combination Pre-heater Thermoswitch Performance Test
  1. Disconnect the harness from the heater/thermoswitch combination unit.
  2. Using one of the cooling methods listed under "Equipment Needed", reduce the temperature of the thermoswitch to below 40° F.
  3. Connect the ohm meter leads to the pre-heater pins. Use the table to determine whether the pre-heater resistance value is in the acceptable range.
  4. Using one of the pre-heating devices listed under "Equipment Needed", raise the temperature of the combination pre-heater to 70°F. The ohm meter should read “open circuit” for the combination units.
Coolant Heat Testing
A Fuel Pro 382 equipped with coolant heat has an extended bottom plate to for the thermovalve and coolant ports. If the bottom plate on the Fuel Pro 382 is flat, the Fuel Pro does not use fluid heat .

A Fuel Pro 483 equipped with coolant heat will have hose connected to the Coolant ports on the body. Determine if the unit has a thermovalve installed before attempting to diagnose thermovalve operation.

Thermovalve Test

  1. Drain the Fuel Pro completely.
  2. Remove the fluid hoses attached to the bottom plate. These will either be engine coolant hoses or return fuel hoses. Engine coolant hoses will have to be plugged when removing them from the Fuel Pro.
  3. Remove the bottom plate.
  4. While looking into the fluid port of the bottom plate, run cold water over the thermovalve for 30 seconds, then run hot water over the thermovalve to determine whether the thermovalve spool is opening and closing.
  5. Replace the bottom plate seal and install the bottom plate onto the Fuel Pro.
  6. There are two styles of bottom plates.
    Torque the bolts of the bolt-on version bottom plate to 10 ft-lbs.
    Torque the collar of the collar version to 50 to 60 ft-lbs. Note: Applying 2-3 drops of thread sealant to secure the bottom collar is recommended.
  7. Reconnect the fluid hoses to the bottom of the Fuel Pro.
  8. Fill the Fuel Pro with fuel and restart the engine.
  9. Check for leaks.
WIF Testing

Water that has collected in the Fuel Processor can cause cold weather related fuel issues. The best practice is to frequently drain the water. If the unit is equipped with a WIF (Water-in-fuel) Sensor and does not appear to be detecting accumulated water, follow these steps to test the WIF.

Drain the DAVCO Fuel Pro. Disconnect the WIF sensor from the chassis harness. Remove the WIF sensor.

Inspect the WIF sensor. Inspect the probe tips for deposits, corrosion or missing (clean or replace as needed).

Inspect the connector terminals for damage or corrosion (replace as needed).

Inspect the wiring at the WIF body (improper harness routing can result in failure at this location).

Test the WIF sensor at the connector using a Digital Volt Meter. Set the meter to the OHM mode auto range or select manual mode range 0-100kΩ.

The WIF sensor resistance value should be 82kΩ +/- 5% (or 77.9kΩ to 86.1kΩ). Replace sensor if reading is outside of the specification. If the resistance test falls within specification the sensor is good and the issue is unrelated to the DAVCO Fuel Pro WIF. The ECM is looking for the 82kΩ load to confirm the sensor is connected. Therefore with a good WIF an existing WIF related code can also indicate an issue with chassis wiring. Proceed to troubleshooting the chassis wiring for potential issues.

Cold Weather Solutions